


- 9 October 2020
Build your own carport
A CAR CONSTANTLY EXPOSED TO THE ELEMENTS INSTEAD OF HOUSED UNDER A CARPORT IS LIKELY TO END UP A BUCKET OF RUST.
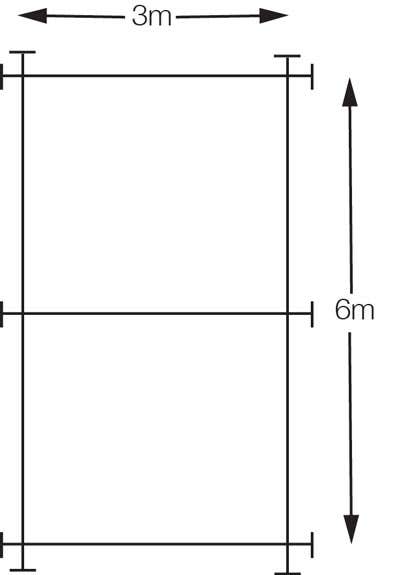
Before rushing out to protect the prized possession, think where to locate the carport. Try to keep it reasonably close to the house so it's not a marathon run to the back or front door. However, make sure to contact the local council to discuss the plans as there will undoubtedly be some restrictions and a building permit may be needed. This carport project we show covers an area approximately six metres long x three metres wide – ample for the average family car.
THIS COMBINATION
Posts
Order 6 Treated Pine H4 posts 90 x 90mm x 2.7m long.
Beams
Order 2 Treated Pine H3 beams 190 x 45mm x 6.3m long.
Order 2 Treated Pine H3 posts 140 x 45mm x 3.3m long.
Rafters
Order 7 Hardwood rafters 150 x 38mm x 3.3m long.
Order 4 Treated Pine H3 beams 75 x 35mm x 3m long.
Hardware
Also required are galvanised coach screws (20 – 90 x 10mm), six post saddles (150mm high), galvanised coach bolts and nuts (6 -125mm), a packet of 100mm galvanised bullet head nails, concrete mix, roofing material of your choice, at least 18 metres of flashing 150mm wide, 3.6 metres of downpipe and three metres of guttering together with guttering clips and joins.
SETTING OUT THE JOB
Dig the post holes in each corner. The local council will advise on the hole sizes required depending on soil classification: Now mix the concrete - just enough for each hole at a time, making sure it's well packed in.
Take a post saddle, line it up with the centre of the concreted hole and push it firmly down through the concrete. The "U" of the saddle will need to be 25mm clear of the ground level, so rest it on two small pieces of scrap timber while the concrete is setting (this will keep it about the right height). And of course, use the spirit level to make sure everything is level (Diagram 3). Repeat procedure for each of the other five post holes.
PUTTING UP THE POSTS
Leave the saddles for about a week to let the concrete set. Then put up the posts. It's a good idea to have someone help at this stage.
Have a helper hold each post in the saddle while they are made exactly vertical with the spirit level. Then brace them on two sides so they will stand exactly upright. Drill through the holes in the saddle and right through the post. Slip a coach bolt through and fix it with washer and nut (Diagram 4).
Do all six and already the carport will be taking shape.
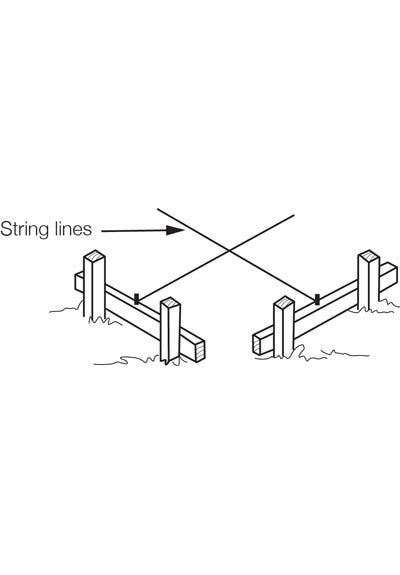
ESTABLISH A DATUM LINE
Unless the carport is on perfectly level ground, a datum line must be established around the posts. A datum line ensures the roofing ends up level.
First, make a pencil mark about a metre up the post that will be the shortest in the carport. Drive a nail into the timber at this pencil mark. Rest one end of a length of timber on the nail and have a helper hold the other end against the next post. Use a spirit level to get the piece of timber level then drive another nail in to support it at the second post. Continue until you have nails on all four posts. A datum line should now be around the base of the posts (Diagram 5).
Transfer this level exactly to the height chosen for the roof and mark the posts all around at this point. Remove the bracing, take the posts down and trim them to the top line marked. Mark the posts to ensure they go back to the place they came from.
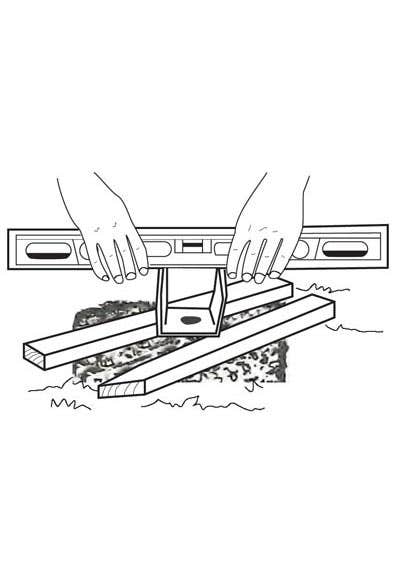
Diagram 3: Leveling the supports
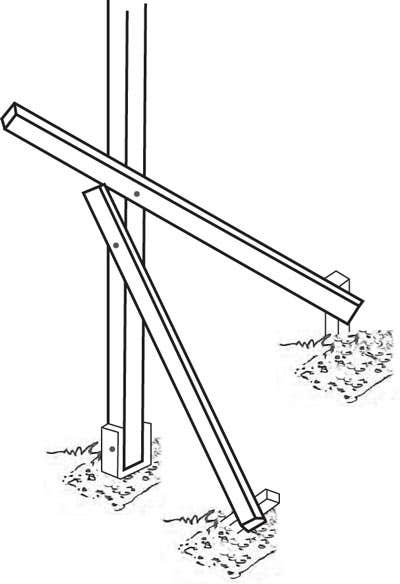
Diagram 4: Bracing the post
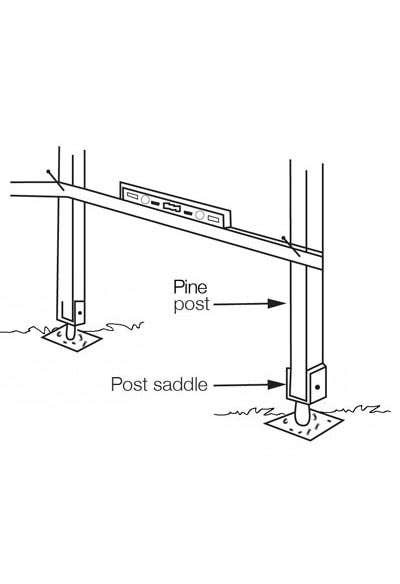
Diagram 5: Establishing the datum line
CUT THE BEAM HOUSINGS
Cut the beam housings while the posts are on the ground. The beam housing is the area into which the side beams will be fixed.
Use a power saw or handsaw to accurately cut away a 50mm x 250mm notch from the top of the post (making sure it's on the outside face). This will allow the beams to sit in place flush with the outside of each post.
Now put up the posts again, using a spirit level to make sure they are vertical, and re-brace them in position.
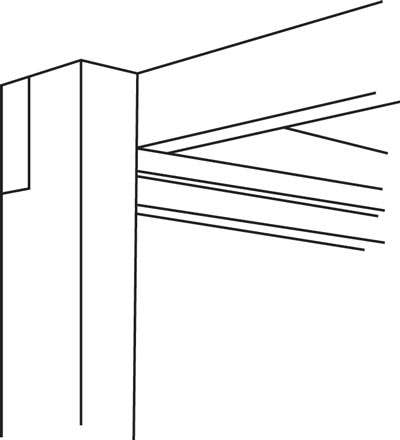
Diagram 6
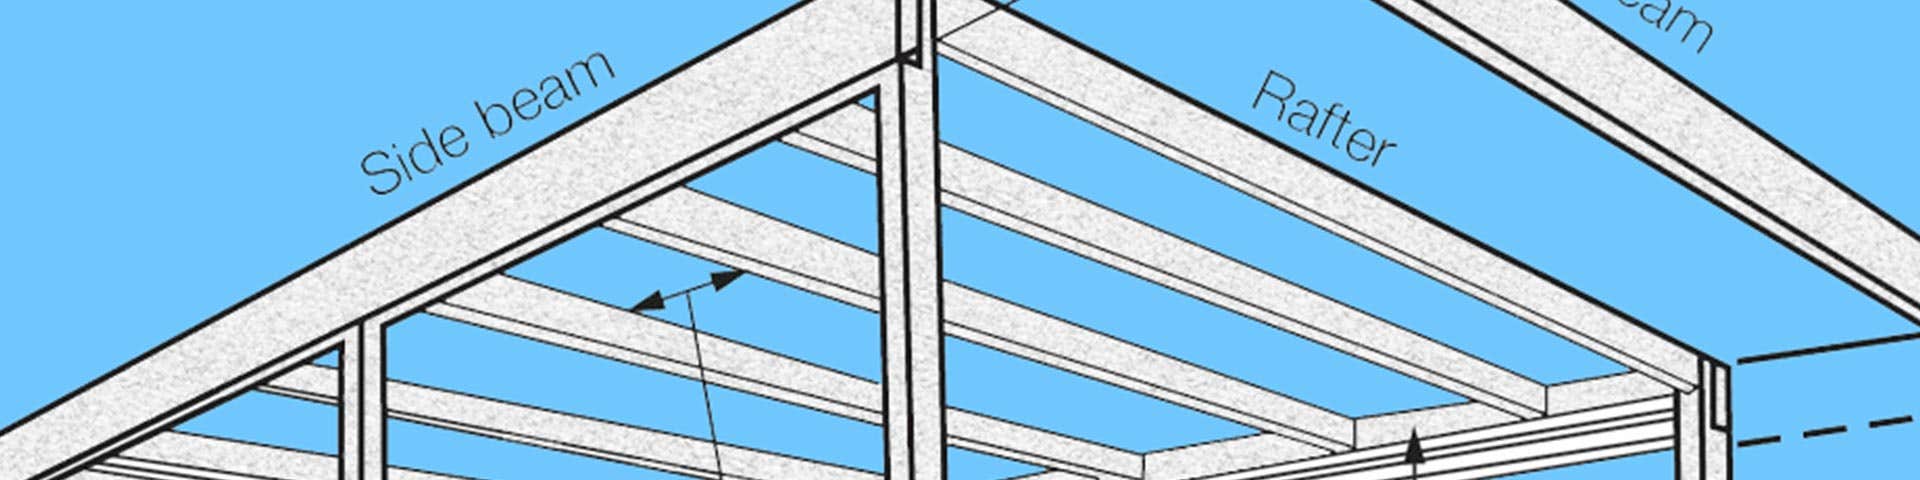
FIX THE SIDE BEAMS
To fix the side beams, it is handy to have a couple of ladders and a friend to help. Rest the side beams in the housing cut in each post. Use G-clamps to hold them in place. If the housings are cut correctly, they will be sitting flush. Drill two holes and secure each beam in place with 90mm coach screws (Diagram 6).
PUT UP THE RAFTERS
The rafters come next. They are the lengths of timber that support the roof. But first, set the fall of the roof so the rain will run off into the guttering.
About 40mm of fall to the side selected is needed for run-off- usually the rear side. Hammer a nail at the front (right at the top and on the inside). Then run a string down the carport and attach it to the other end beam - but this time 40mm from the top. This will give the fall.
Nail a 75 x 35mm batten down each side beam (along the string line). This becomes the support for the rafters.
Now measure and cut the rafters to the width between the side beams, fit a rafter every 900mm and nail them securely (Diagram 7).
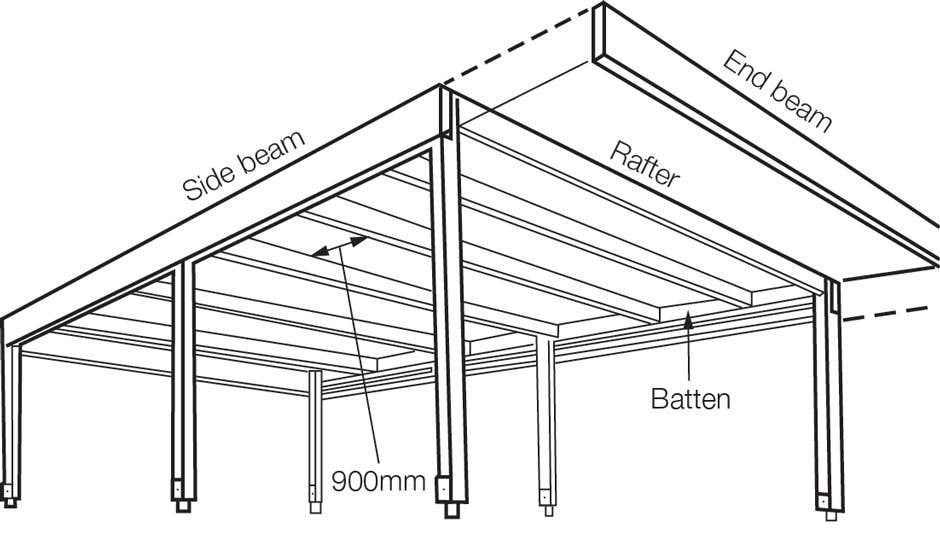
Diagram 7: Completed Framework
FIT THE GUTTERING AND DOWN PIPE
The guttering and downpipe will go at the fall end of the roofline.
Attach the gutter, using gutter brackets, across the end beam just below the line of the roofing. The guttering should have a fall to the outlet end so rainwater will run off into the downpipe.
Connect the downpipe to the nearest convenient stormwater outlet. This could be at a nearby downpipe on the house.
PUT ON THE ROOF
There are various kinds of roofing sheets available.
Trimdeck pattern roofing in either Zincalume or a range of Colorbond finishes can be supplied cut to order or from stock. Your local Home Timber & Hardware will be able to help.
Fit the first roof sheet so it fits along the inside of the side beam. Work your way across the rafters until the entire carport is covered. Use the maximum recommended number of fasteners according to the manufacturer's instructions. It's definitely a case of better too many than too few.
Bend flexible metal flashing over the roofing where it meets the inside edge of the beams and nail it in place. This will ensure a waterproof edge.
COATING THE TIMBER
Although the carport is now finished and usable, it is advisable to coat all the timber (or at least the outside facing beams) with a timber stain or paint. Paint it the same colour as the fascias on the house, or in a colour that complements it.
TIPS FROM THE TRADE
- Have all tools and materials ready for the day's work. Driving down to the timber yard for more material can add frustration and hours to the job.
- When getting timber delivered, stack it level and off the ground. Cover it with an old tarp or heavy plastic to protect it from the weather.
- Remember, measure twice before cutting any material. Replacing lengths of timber cut to the wrong size can be expensive.
- Before starting, remember a building permit. Check with the council about the local regulations and soil classification.
- Think about the location of the stormwater drain. Check the original plans of the house if unsure of its location or call in a plumber. The carport must be sited somewhere close to the stormwater lines.
- Don't site the carport too close to trees. The gutters on the carport should be cleaned just as regularly as those on a house.


