


- 14 October 2020
Installing a Watering System
A WATERING SYSTEM IS THE EASIEST AND MOST EFFICIENT WAY TO KEEP YOUR GARDEN GREEN.
There are three types of systems – Microspray, Drip and Pop-up. This brochure is designed to help you select and install the right system or combination of systems for your garden.
PLANNING YOUR SYSTEM
Use graph paper to draw a scale plan of your garden. Include everything that’s there: shed, trees, garden beds, lawn areas, paths and taps. Use this plan to sketch in the layout of your new watering system exactly as you want it, and see what components you will need to construct it. In the case of pop-up and microspray systems, spray heads need to overlap to ensure water is evenly distributed.
Basic components that you will require include:
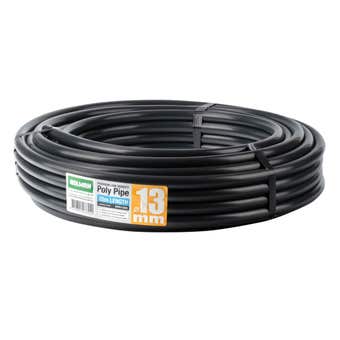
- 13mm polytube
- 4mm polytube (19mm polytube is recommended for pop-up systems)
- appropriate sized elbow joints, tee joints, joiners, end sleeves and hoseclamps
- Spanner Key punch
- A sharp knife
- Spray heads, drippers and pop-ups as required
- Goof plugs
We also recommend that you install a filter to ensure that your system does not block up. If you are only installing a drip system, you may find that you need a pressure reducer if your drip heads spurt rather than drip. Combination filter/pressure reducers are available.
Water flow
For lawns and garden beds, the water flow from your tap will determine how many spray heads you can fit to one line. To test your water flow, time how many seconds it takes to fill a 9 litre bucket. Test each tap that you plan to use for your system. Take several readings throughout the day and use the lowest reading.
(NB For pop-up systems, we also recommend that you take the reading at the end of the line that you plan to run.)
You will note that microspray, drip and pop-up sprinkler heads have a specific Water Flow Rate. Add together the Water Flow Rates of all the heads you plan to use on each line and ensure they do not exceed the usable flow rate from your tap.
| Seconds to fill bucket | Usable water flow from tap.Litres per hour (LPH) |
|---|---|
| 5 | 5184 |
| 8 | 3216 |
| 10 | 2592 |
| 15 | 1728 |
| 20 | 1296 |
| 25 | 1008 |
| 30 | 864 |
| 35 | 740 |
| 40 | 684 |
NB: The Usable Flow Rate is calculated at 80% of the actual flow rate to allow for loss through friction.
TYPES OF SYSTEMS
Microspray
Microspray systems are ideal for small flower beds, rockeries, ferneries and vegetable gardens. They are designed to provide individual absorbed into the leaves and soil. This ensures that each plant receives the right amount of water. Microspray systems minimise run off, soil compacting and overspraying onto paths and fences.
Spray heads are available in full, half and quarter circle sprays as well as strip sprays to suit every corner of your garden. Spray heads should be placed 1 to 1.5 metres apart. Use riser tubes and stakes to raise your spray heads above the foliage of shrubs and vegetables.
Drip
A drip system delivers a slow trickle of water which seeps deep into the soil to the plant’s root system. It is ideal for trees, shrubs, pot plants and hanging baskets as well as vegetables such as tomatoes. A drip system can be simply adjusted to provide the right amount of water for each plant. Drippers are useful in preventing water loss in more exposed garden beds as they are less affected by wind or evaporation than sprays.
If you have sandy soil, place drippers closer together and water more frequently than if you have heavy soil where water spreads and is retained longer. To drip water a tree, lay a loop line of 13mm polytube around the drip line of the tree. Connect this loop line to the main line with a tee and seal the end with an end sleeve.
Pop-up
A permanent in ground pop-up watering system is the most efficient way to water your lawn and larger garden beds. Spray heads pop-up when water is turned on and retract when not in use, allowing you to mow safely.
Pop-up systems are ideal for lawn areas and larger garden beds. There are a range of spray heads available in a range of spray patterns so that you can tailor the watering area to suit your lawn and garden.
For optimum water flow, we recommend that you use 19mm polytube for your pop-up system. Don’t forget to test the water flow rate at the end of the line to establish how many pop-ups you can attach to the line.
INSTALLATION
Preparation
Using your plan, lay out the components around the garden where you intend to install them. Roll the polytube out flat and use bricks or stakes to hold it in position. The longer the polytube is left in the sun, the easier it will be to handle.
Working from the tap, cut the polytube to the required lengths. Where necessary, use joiners, elbows or tees to achieve your desired layout. Dipping the tubing ends in hot water will make them pliable and easier to fit. Don’t forget to thread hose clamps onto the tubing before fitting the ends onto the joiners, tees etc.
If the tubing has to pass underneath a pathway, make a tunnel by lashing a hose with a high pressure nozzle to a metal stake. Turn the tap on to maximum pressure, then push the stake through the soil under the path.
Decide where you are going to place the valves if you are using shut off valves to increase the number of microsprays on one line, or if you are combining drippers and microsprays.
Flush with water to ensure there is no dirt or grit in the system and to check for any leaks.
Assembly
Seal the end of the polytube with an End Sleeve.
Referring to your plan, pierce the polytube at the appropriate points using the Spanner Punch. Don’t worry if you make a mistake – simply plug in a “goof” plug.
For extra reach into hanging baskets, pot plants etc, use 4mm polytube as a distribution line from the main supply line using a 4mm joiner to connect them. A dripper or microspray head then pushes into the free end of the 4mm tube.
Assemble the stake and riser tubes and attach spray heads and drippers as required.
Microsprays can be screwed directly into the main polytube if the tubing is raised off the ground along a wall or fence. (They should never be screwed directly into above ground tubing as they can become blocked by soil splashing up when it rains.)
Pop Ups are joined to the main polytube by cutting the line and inserting elbows, tees and joiners (don’t forget to slip hose clamps onto the line first to secure the joins). NB Make sure the number of heads you are installing does not exceed the number recommended for your flow rate.
Turn on the water and test your system. When you are satisfied, secure all connections and tighten the hose clamps with pliers.
Burying the system
For microspray and drip systems, dig a shallow trench about 30mm deep. Place your main line into the trench and cover with soil making sure that you leave the riser tubes sticking out of the soil. Burying your system helps prevent algae growing in the polytube. In garden beds, you can cover the system with bark.
For pop-ups, use marking stakes and string line as a guide to digging your trenches. Cut a V shaped trench 20cm deep. Remove the turf carefully so that it can be replaced without damaging it. To make cleaning up easier, dump the turf on plastic sheeting spread alongside the trenches.
Place the system in the trenches, keeping the pop-ups flush with the soil. Backfill and tamp down the turf, making sure the pop-ups remain at the correct height.
Controlling your system
Whether you have a simple sprinkler, Microspray, Drip or Pop-up system, there are a range of accessories that allow you to control watering to your precise requirements.
Water computer
Water computers allow you to automatically water your garden at pre-set times to suit a variety of watering needs.
Water distributor
The ideal accessory for your water computer. Allows up to six areas of your garden to be watered automatically from the same tap.
Water timer
Automatically switch off after a set period of time from 5 minutes to two hours.
Twin tap
Allows two different systems to be run from the one tap.
Multi-flow adaptor
Provides four adjustable tap outlets to allow four different systems from the one tap.
MAINTENANCE
For trouble free operation, you should regularly clean your water filter.
If microsprays become blocked, turn the spray cap upside down over the riser tube while the water is running. This should blow out any dirt.
Clogged drippers are easily cleaned by removing them from the polytube line and separating the two dripper parts. Flush the parts under a tap and reassemble.
If dirt or grit blocks a pop-up, simply unscrew the nozzle from the piston. Clear the nozzle, flush the system and reassemble.