


- 14 October 2020
Building a storage chest made easy
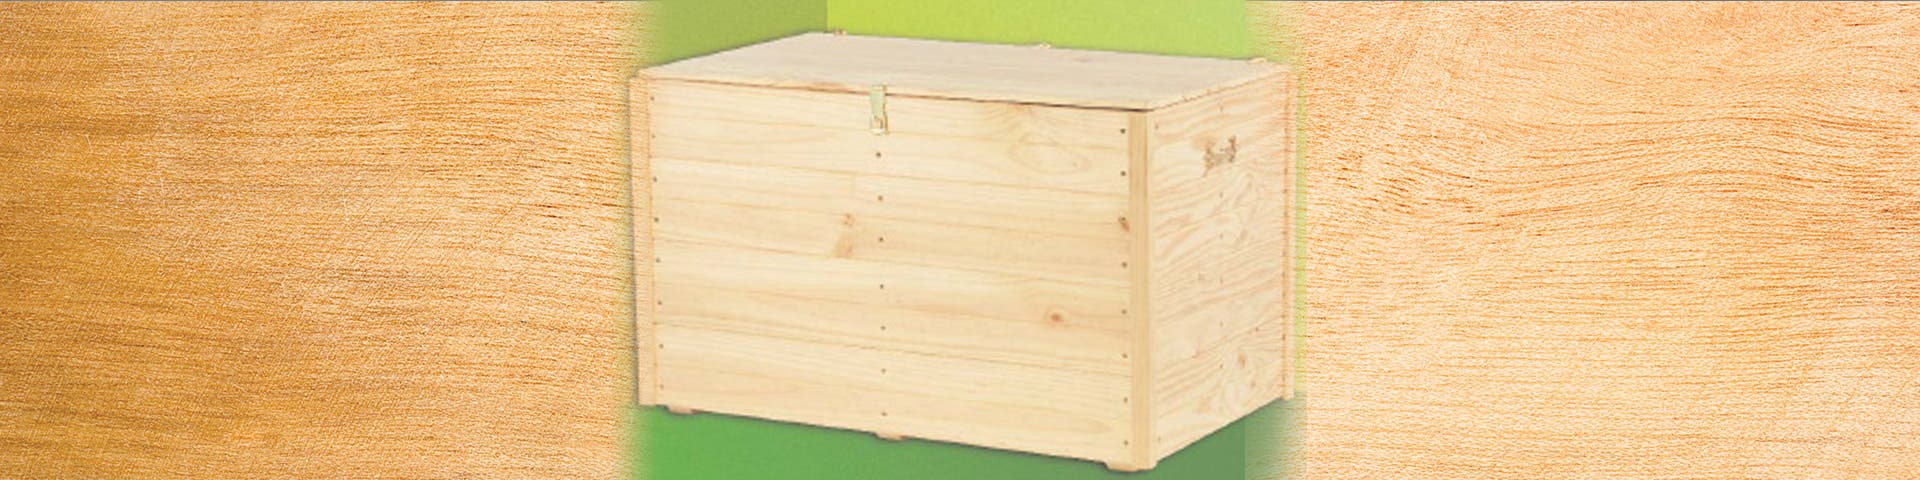
A STORAGE CHEST CAN BE A REAL TREASURE CHEST, PERFORMING A WEALTH OF ROLES AND FUNCTIONS.
First and foremost, it can be a godsend in solving ever increasing storage woes.
It is ideal for linens, bulky bedding, out of season clothing or as a general toy depository in the war against those pint-sized human tornadoes. Alternatively, it would be well appreciated in a sewing room for storing patterns and materials, or even for more heavy duty storage such as firewood, or as a way to keep boots tidy near a doorway.
But a storage chest is also a versatile piece of furniture, often used as a casual seat or even as a coffee table.
Whatever it's used for, rest assured it's not a job that requires any serious carpentry skills.
MATERIALS REQUIRED
- 140mm lining boards 12mm thick
- Ends: 8x 506mm long
- Side: 8 x 900mm long
- Bottom: 4 x 876mm long
- Top: 4 x 900mm long
- 42mm x 19mm battens (dressed pine)
- 8 x 434mm (vertical for sides and ends);
- 4 x 486mm (horizontals for ends);
- 4 x 876mm (horizontals for sides);
- 3 x 500mm (for base);
- 3 x 468mm (for lid)
TOOLS REQUIRED
WHERE TO START
Basically, battens and lining boards are the main materials to build a chest. Buy pieces that are sufficient to be cut to the required size. Alternatively, many timber merchants will cut to the exact measurement for a charge.
We've chosen to use radiata pine, but many other timbers would be just as suitable and offer a different look altogether. The bottom, sides and lid are designed to be made from tongue and groove lining boards for easy construction.
STEP 1
The sides
The sides are quick and easy to make. For each side, cut four boards 900mm long, two battens 876mm long and three battens 430mm long. Plane the tongues off two of the boards and the grooves off two others. Sand the edges smooth (Diagram 1).
Check everything is square, then tap a set of tongue and groove boards together with the hammer. Each side will comprise a board without a tongue, two complete boards, and a board without a groove. Now nail a 876mm batten along each outside edge of the boards. Make sure it is flush and is 12mm in from each end. The three 434mm battens now go crossways -one at each end and one centred. Then the second 876mm batten is nailed to the bottom 12mm up (Diagram 2).
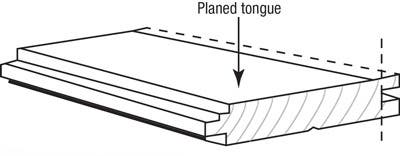
Diagram 1 - Sand edges smooth
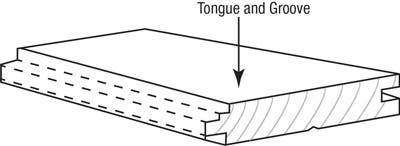
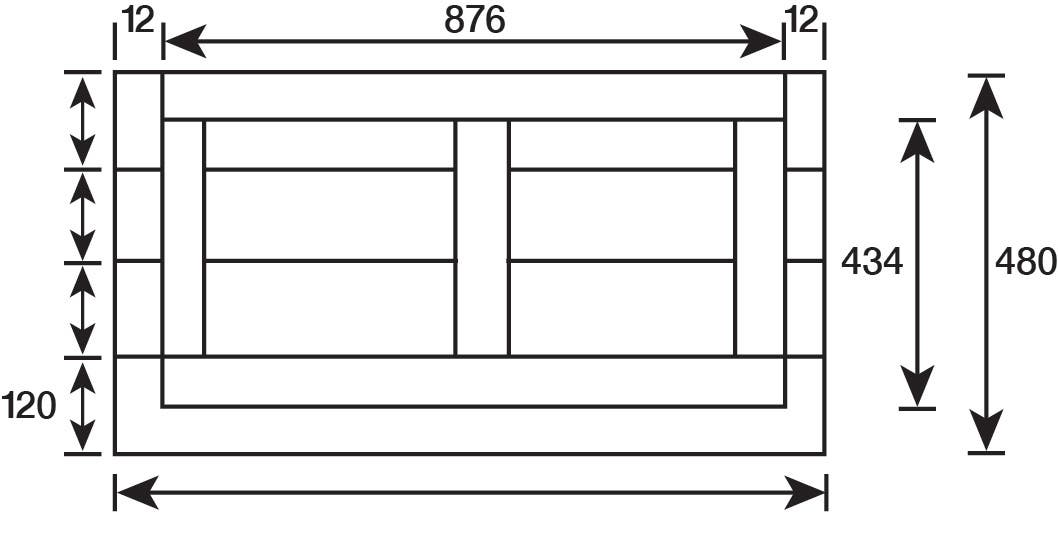
Diagram 2 - The sides
STEP 2
The ends
Use four boards 506mm long to make up each end. Plane off the tongues from the top and bottom boards and make the surfaces smooth. Centre and nail a 468mm batten to the top board. Join the four boards together with a 430mm batten, then fix a 468mm batten 12mm from the bottom edge (Diagram 3).
STEP 3
The bottom
To make the bottom cut four boards 876mm long. Take 18mm off the groove side of one board and 18mm off the tongue side of another board. Sand the edges smooth.
Check everything is square then tap a set of tongue and groove boards together.
Nail the three 506mm battens across the boards. The two outside battens positioned 19mm in from the end and 15mm in from the side. Centre the third batten across the boards (Diagram 4).
STEP 4
The lid
To make the lid, plane the tongue of one 900mm long board and the groove of another. Sand the edges smooth. Check everything is square then tap a set of tongue and groove boards together with the hammer.
Nail the three 460mm battens across the boards. The two end battens must be positioned 35mm in from the end of the boards and 35mm in the side edge also or the lid will not close flush.
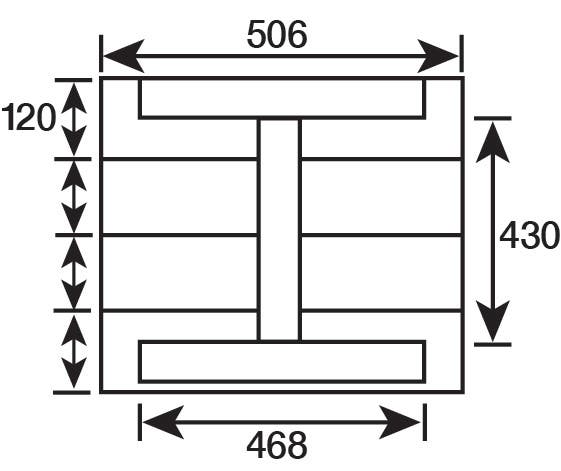
Diagram 3 - Fix side to bottom
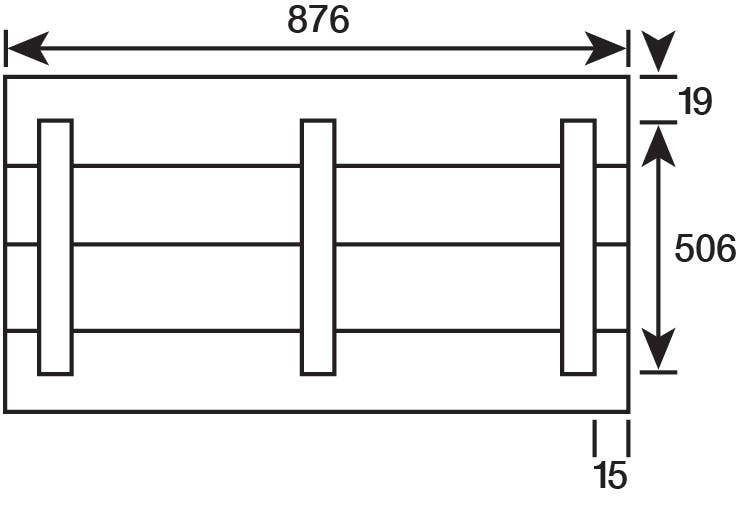
Diagram 4
STEP 5
Fix the sides to ends and bottom
Now fix the sides to the ends with nails. The top edge must be flush.
Turn chest over to fit bottom into recess formed by sides and ends. Nail bottom into place. Battens on bottom should be to outside (Diagram 6).
Turn chest back over to fit lid – it’s really a repeat process of the bottom. Fit the boards together and plane off the outward facing tongue.
Just ensure it fits over the chest snugly and will open smoothly. The edge to be lifted can have a cutaway section in the centre for easy lifting. Sand the edge smooth.
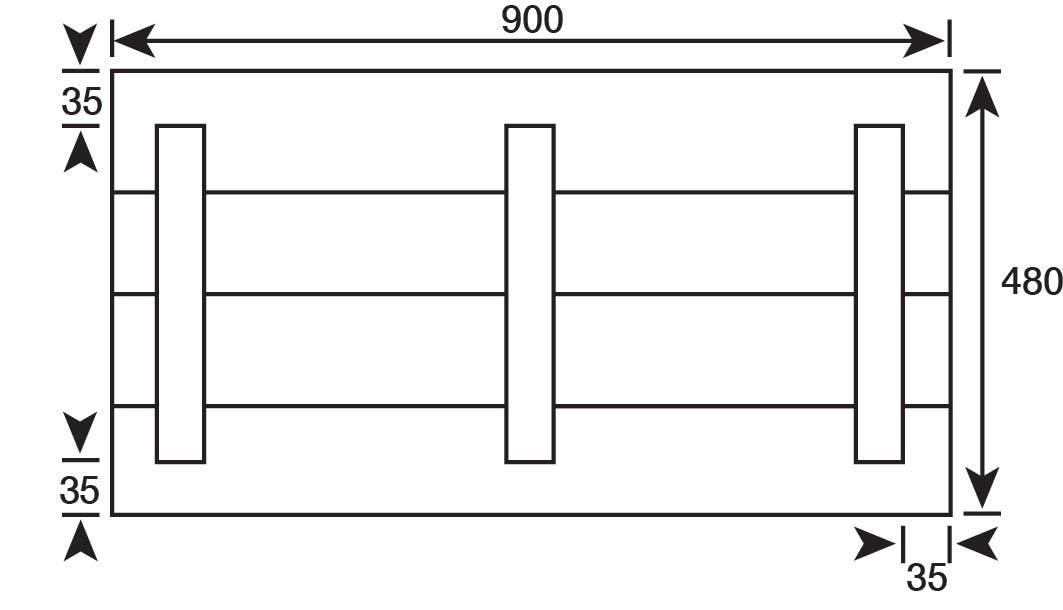
Diagram 5 - The lid
STEP 6
The hinges
Fit hinges. Choose either strap hinges, butt hinges or piano hinges.
Strap hinges are the simplest to fit; they simply screw into place. Butt hinges and piano hinges need to be recessed first with a chisel.
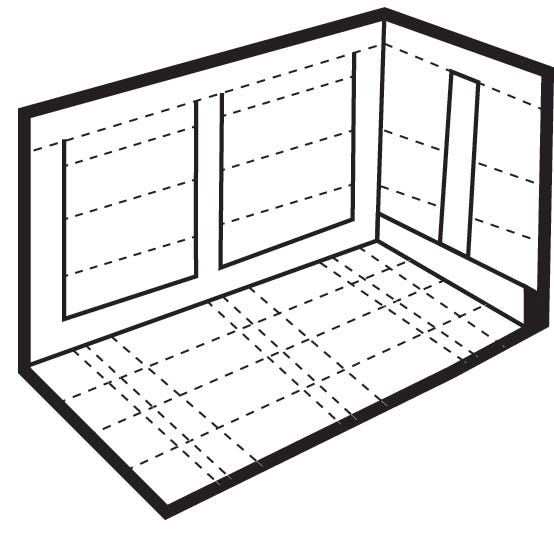
Diagram 6 - Battens to hold sides at top
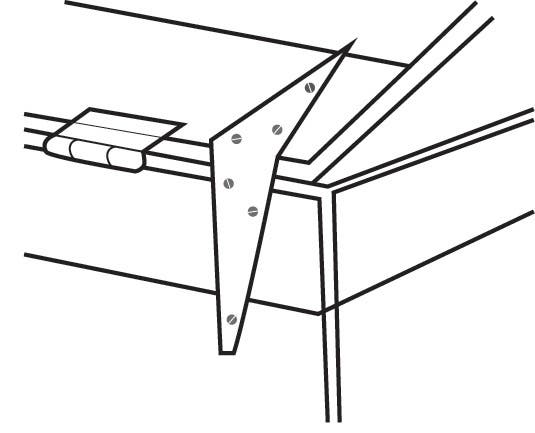
Diagram 7 - Hinges in place
TIPS FROM THE TRADE
- Measuring is easy, but materials are expensive, so double check all measurements and markings before cutting a piece of timber.
- Always plane with the grain.
- Don't take off too much with each sweep.
- When you need several pieces of timber all the same length, you can save time by clamping them together, measure once and cut all together. Even if you have been a fraction out measuring, at least all pieces will be the same length.
- When fixing outside, you should always use galvanised nails/bolts as standard bright steel nails etc will rust and cause unsightly stains on the timber, which are very hard to remove or hide.
- Always wear goggles for eye protection and ear muffs when using power tools.
- Follow the manufacturer's instructions when applying exterior stains or paints - short cuts will result in an inferior job.


