


- 12 October 2020
Do it yourself laying concrete
Where to start
It’s well worth studying this project carefully as concrete is such a useful and practical material. But be very careful to plan ahead; changing a concrete driveway, for example, is difficult once the concrete has set. However, after the art of concreting is mastered, the technique is basically the same whether making a path or putting down a floor for a tool shed. It’s a case of building the formwork, mixing the ingredients, laying and levelling. For a large job, consider having concrete delivered in bulk.
Tools required
The tools needed are a heavy duty wheelbarrow, long spirit level, shovel, circular saw or handsaw, measuring tape, edger, hired cement power mixer (optional), grooving trowel, wooden and/or steel float, tough bucket, sledge hammer, claw hammer, stringline and boltcutters.
Use a builder’s square for ensuring corners are 90 degrees and a tamping board for compacting and levelling a concrete slab. They can both be made at home.
Builder’s square: It can be made from 75 x 25mm timber with the shortest side marked at 600mm, the second side at 800mm and the diagonal at 1000mm. Nail together with a half-joint at the right angle corner and the diagonal nailed on top.
Tamping board: Use a perfectly straight 175mm x 25mm board about 300mm longer than the slab width. Use a 150 x 50mm board for very broad slabs. To work standing up, bolt on handles at each end.
Materials required
To do the job properly, order the following; sand, crushed aggregate, dry cement or premix concrete if it is a small job; formwork timber consisting of straight boards at least 25mm thick and as wide as the concrete’s depth; bar chairs (50mm for 100mm-thick concrete and 40mm for 75mm-thick concrete or 1/2 a brick); steel reinforcing (F52 for 100mm-thick concrete for paths); stakes that are 50mm square and long enough to cover the depth of concrete plus about 300mm for driving into the ground; sheet of plywood or hardboard; sacking or polythene sheeting; nails (50 x 2.8mm bullet head).
Concreting decisions
Sooner or later, a concrete structure is going to be needed - whether it’s a base for a garden shed, a pathway or even an ornamental pond. Concrete is basically a mixture of cement, sand, stone aggregate and water. How it is made depends on the size of the job at hand. If it’s a small job, concrete can be bought already pre-mixed in 40kg bags. Just add water.
For larger jobs, order bags of cement separately, along with a delivery of sand and aggregate. Check with your local Home store. There are different mixes of concrete, depending on the job. If mixing concrete for a heavy-duty area such as a driveway (at least 100mm thick), use one part cement, two and a half parts sand and four parts aggregate. For lighter-duty strips and pathways, use one part cement, two parts sand and three parts aggregate. Where not much strength is required (garden wall foundations or foundations under pavers) use one part cement, two parts sand and six parts aggregate.
As a quick guide, to make one cubic metre of concrete (enough for an area 10m x 1m x 100mm thick), eight bags of cement, .5 cubic metre of sand and .75 cubic metre of aggregate will be needed.
Excavating the site
All concrete work involves some excavation and grading. Measure and mark out the area to be concreted. Peg the corners, then stretch a stringline all around. Excavate the site to the depth wanted. Dig out a little extra to accommodate the formwork. Make sure the ground is firm and level and has no loose vegetation.
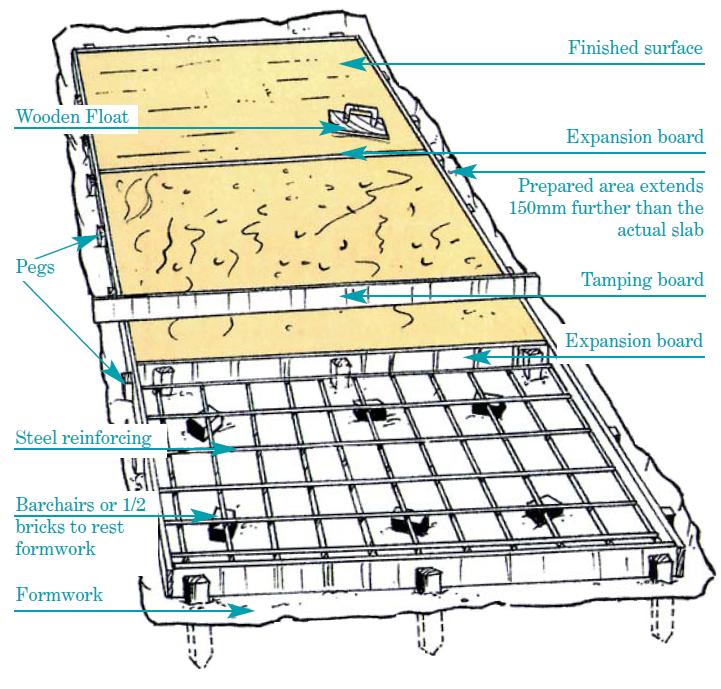
Constructing the formwork
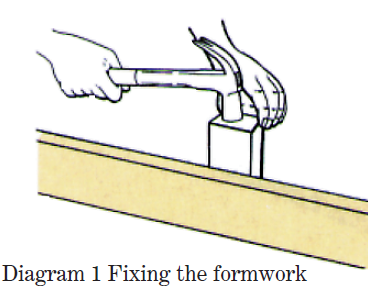
The formwork is nothing more than a simple timber box to hold the concrete in place while it hardens (Diagram 1). The important thing is to ensure the tops of the formwork are all level because this is going to be the finished level of the concrete. In most cases, reinforcing mesh to strengthen the concrete will be needed.
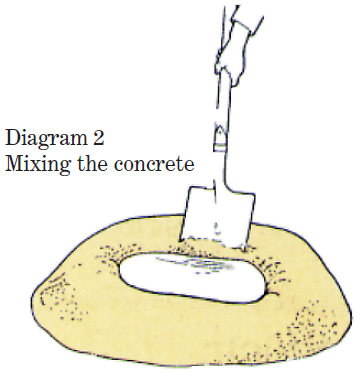
Mixing concrete
Now mix the concrete. If it’s a small job, do this in a clean wheelbarrow or on a clean, smooth surface such as a large piece of board. Use a plastic bucket to measure out the correct amounts of cement, sand and aggregate (according to the strength of mix wanted). Shovel it several times until it becomes a uniform grey colour with no patches of cement or sand. Add water in the middle of the pile and keep turning it over until the mixture has a good workable moisture (Diagram 2). If mixing larger amounts, it may pay to hire a concrete mixer for the day. For really large projects, probably the best way is to order it ready-mixed. Just tell the supplier the size of the area to be concreted and he will calculate the amount and cost and deliver it.
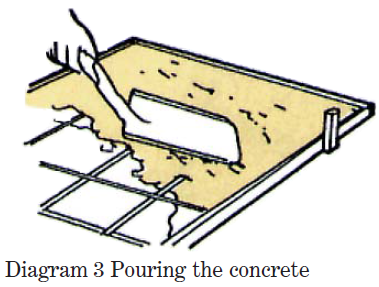
Pouring the concrete
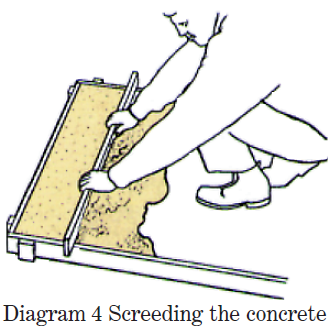
Pouring the concrete is easy. First wet the formwork and the bottom of the site. Spread the concrete evenly with a shovel or a rake (Diagram 3). Make sure all the corners are filled. When the concrete settles, drag a screed (a piece of board) across the top of the forms to level off the concrete. Use a saw action to push the concrete along and fill any low spots behind it (Diagram 4).
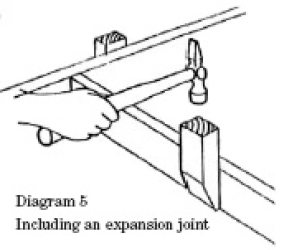
The concrete slab should not be longer than 3 metres in any direction. Joints are used to control cracking. The simplest way to do this is include a 5mm piece of softwood or bituminous stripping. This remains in the concrete as an expansion joint (Diagram 5).
Finishing off
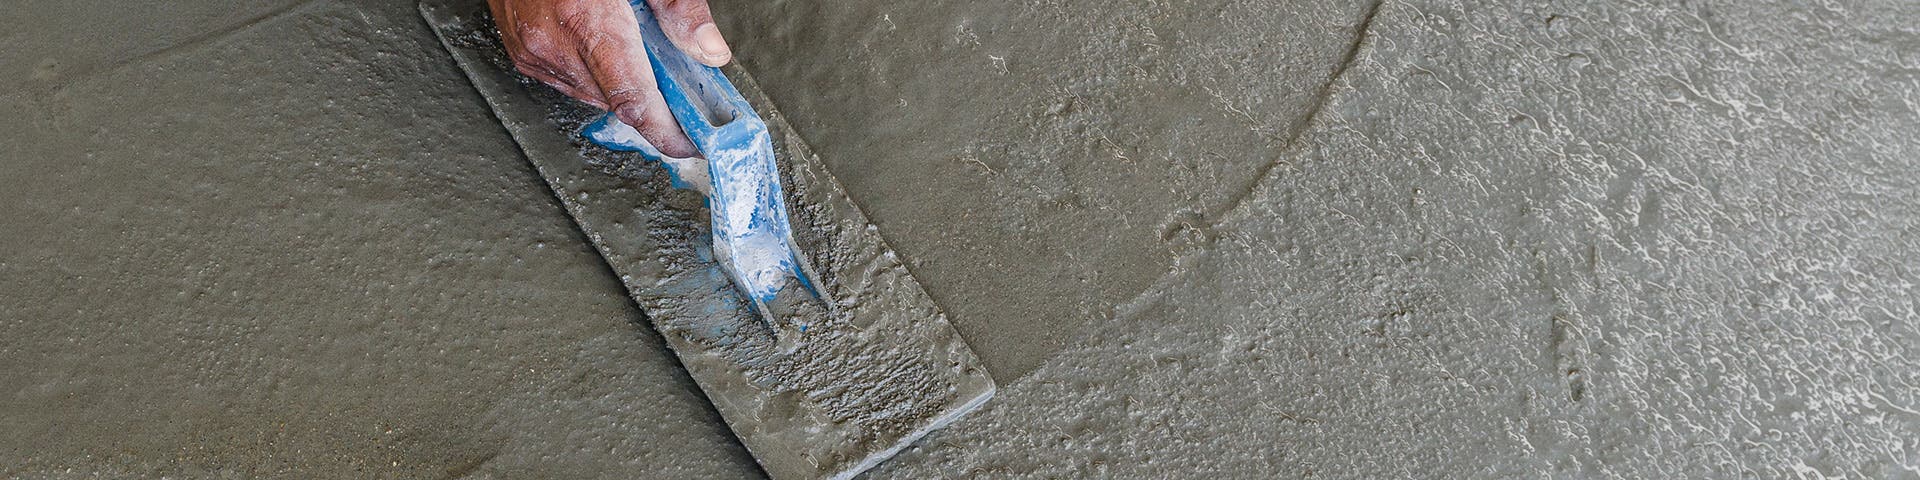
Finishing the newly concreted surface consists of smoothing it with a wooden float. Run the float back and forth across the concrete. This allows the water in the concrete to rise to the surface.
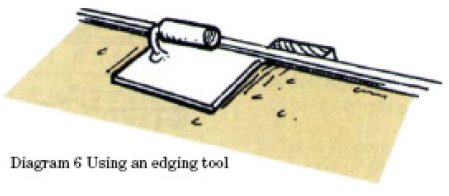
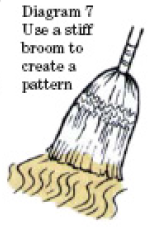
Don’t brush this water off. Allow it to evaporate naturally then float the surface again. For an even smoother finish, use a steel float. Just two passes should be enough. Round the edges with an edging tool for a professional finish (Diagram 6). Alternatively, a skid resistant surface is easily achieved by drawing a stiff-bristled broom across the concrete to create a pattern of curved lines (Diagram 7).
Allow the concrete to cure. It’s best to cover it with damp sacking or plastic. Keep it covered for several days before removing the framework.