Applying Ultraset effectively onto concrete substrate, including preparation, adhesive choice, and tips for optimal bonding.
Detailed instructions for using Ultraset on yellow tongue substrates, highlighting key considerations and adhesive selection for best outcomes.
Advice on preparing and bonding new flooring over existing timber floors with Ultraset, addressing surface preparation and product recommendations.
Selecting appropriate trowel sizes to ensure correct adhesive coverage and performance for moisture barrier.
Efficient clean-up after flooring installation is essential to maintaining a professional finish and preserving the appearance of timber and surrounding surfaces.
Sticks Like Sh*t All Weather Adhesive
Bostik Sticks Like Sh*t is a high-performance SMP hybrid adhesive engineered for maximum bonding strength in all conditions. Suitable for interior and exterior use, it provides a fast, secure grip on a wide range of materials, including timber, concrete, tiles, metals, and plastics. Its advanced formula works reliably on damp or non-porous surfaces, making it the go-to adhesive for tough bonding jobs.
Features:
- Hybrid-based adhesive with superior bond strength
- Universal bonding for interior and exterior applications
- Primerless adhesion on most surfaces, even damp ones
- Neutral curing system, low odour
- Excellent resistance to UV, weather, moisture and mould


Learn More From Our Videos
How To Install Engineered Floorboards
Flooring. By Bostik | Ultraset® 3 in 1
FLOORING. BY BOSTIK | ULTRASET® SF
Browse the Bostik Range
Substrate Application – Concrete Substrate for Ultraset Adhesive
Bostik’s Ultraset adhesive range is designed to deliver exceptional performance on concrete surfaces, providing strong bonding, moisture protection, and ease of installation. By following the proper preparation and application steps, you can ensure a durable, professional-grade floor that stands the test of time.
Step 1: Assess Moisture Content
- Ensure the concrete slab is fully cured (minimum 28 days) and dry to touch. The moisture content should be below 5.5%.
Step 2: Surface Preparation
- Clean the concrete surface thoroughly to remove dust, debris, grease, and any contaminants.
Step 3: Apply Moisture Barrier (If Required)
- For areas with higher moisture levels, apply Bostik Ultraseal Vapour Barrier or Ultra Moisture Seal 1K.
Step 4: Adhesive Application
- Select the appropriate Ultraset adhesive (e.g., Ultraset SF, HP, 2in1, or 3in1) based on flooring type and use a suitable notched trowel, ensuring even coverage.
Step 5: Install Flooring
- Lay the timber flooring onto the adhesive, ensuring full contact and allow the adhesive to cure.
Correct preparation of the concrete substrate is essential to maximise the performance of Bostik Ultraset adhesives. Ensuring the surface is dry, clean, level, and properly primed will create the ideal conditions for secure adhesion and long-term flooring integrity. Always consult the Technical Data Sheets for detailed product specifications and application guidelines. With Bostik Ultraset and careful substrate preparation, you can deliver outstanding flooring results with confidence and efficiency.
Substrate Application – Yellow Tongue for Ultraset Adhesive
Yellow tongue particleboard flooring is a common substrate in residential and commercial construction. Preparing it correctly is vital to achieving a secure and lasting timber floor installation. Bostik’s Ultraset adhesive range offers reliable solutions specifically suited to yellow tongue surfaces, ensuring strong adhesion and helping to prevent common installation issues. With the correct preparation and application techniques, you can deliver flawless flooring results quickly and efficiently.
Step 1: Inspect the Substrate
- Ensure the yellow tongue particleboard is structurally sound, dry, and free from contaminants and fill any gaps between sheets with a suitable sealant.
Step 2: Surface Preparation
-
Lightly sand the surface with 120 grit sand paper to remove any waxy residues to expose the surface. Clean thoroughly to eliminate dust and debris.
Step 3: Adhesive Application
-
Select the appropriate Ultraset adhesive (e.g., Ultraset SF, HP, 2in1, or 3in1) based on flooring type and use a suitable notched trowel, ensuring even coverage.
Step 4: Install Flooring
-
Place the timber flooring onto the adhesive, pressing firmly to ensure full contact and allow the adhesive to cure.
Preparing yellow tongue flooring properly sets the foundation for the success of your installation. Cleaning, sanding, and ensuring structural integrity, combined with the use of Bostik Ultraset adhesives, provide a strong and dependable bond. Always adhere to the recommended preparation steps and consult the Technical Data Sheets for optimal performance. Trust Bostik’s Ultraset range to help you achieve professional, long-lasting flooring outcomes on yellow tongue substrates.
Substrate Application – Existing Timber Floor for Ultraset Adhesive
Overlaying new timber flooring onto an existing timber surface presents unique challenges—but with proper preparation and the right adhesive system, outstanding results can be achieved. Bostik’s Ultraset range is engineered to deliver superior bonding between timber surfaces, ensuring minimal movement and maximum durability. By following correct substrate assessment and preparation techniques, installers can extend the life of existing floors while delivering a beautiful, seamless finish.
Step 1: Evaluate Existing Flooring
-
Ensure the existing timber floor is well-bonded, level, and free from movement. replace or repair any damaged or loose boards.
Step 2: Surface Preparation
-
Sand the existing floor to remove finishes and contaminants. Clean thoroughly to remove dust and debris.
Step 3: Adhesive Application
-
Select the appropriate Ultraset adhesive (e.g., Ultraset SF, HP, 2in1, or 3in1) based on flooring type and use a suitable notched trowel, ensuring even coverage.
Step 4: Install Flooring
-
Place the timber flooring onto the adhesive, pressing firmly to ensure full contact and allow the adhesive to cure.
Success in timber-over-timber installations relies heavily on substrate stability, preparation, and adhesive performance. Bostik Ultraset adhesives, combined with a methodical preparation process, provide a reliable bond that ensures flooring integrity for years to come. Always refer to Bostik’s Technical Data Sheets for best practices, and support your project with the proven performance of the Ultraset range.
Trowel Selection Guide for Ultraset 2in1 and 3in1
Correct trowel selection is crucial when applying Bostik Ultraset 2in1 and 3in1 adhesives. The right trowel ensures consistent adhesive coverage, optimal thickness for moisture barriers and acoustic performance, and overall system effectiveness. Choosing the correct trowel not only guarantees compliance with product specifications but also helps installers work more efficiently and achieve superior flooring outcomes.
Ultraset 2in1 with adhesive only
- For applications requiring adhesive only, use a 4.5mm V-notch trowel
Ultraset 2in1 and Ultraset 3in1 with moisture barrier properties
-
For applications requiring both adhesive and moisture barrier properties, use a 6mm V-notch trowel.
General Tips:
-
Always refer to the specific product's Technical Data Sheet for detailed trowel recommendations.
-
Ensure consistent trowel angle and pressure during application to maintain uniform adhesive thickness.
Using the appropriate trowel for Ultraset 2in1 and 3in1 adhesives is key to realising the full benefits of Bostik’s advanced flooring systems. Proper adhesive spread ensures maximum bonding strength, effective moisture protection, and acoustic insulation. Always match the trowel size to the specific adhesive and application requirement, and consult the Technical Data Sheets for detailed recommendations. With the right tools and techniques, every installation can meet the highest standards of performance and reliability.
Clean-Up Guide Using Bostik Handy Wipe
Efficient clean-up after flooring installation is essential to maintaining a professional finish and preserving the appearance of timber and surrounding surfaces. Bostik Wipe offers a simple and effective solution to remove adhesive residues, fresh spills, and general grime during and after installation. Designed specifically for use with Bostik’s Ultraset adhesive systems, Bostik Handy Wipe ensures your flooring projects are completed cleanly, quickly, and to the highest standards.
Step 1: Immediate Action
-
Clean any adhesive residual or spills immediately while the adhesive is still wet. Delaying clean-up may allow adhesive to set, making removal more difficult.
Step 2: Use Bostik Wipe
-
Remove a Bostik Handy Wipe from the container and gently wipe over the affected area. Work from the outside of the spill inward to avoid spreading adhesive further.
Step 3: For Larger Spills
-
For larger spills or stubborn adhesive residues, apply light pressure with the Bostik Wipe, allowing the cleaning solution to soften the adhesive before wiping clean.
Step 4: Repeat if Necessary
-
For thick or dried spots, you may need to use multiple wipes or reapply gently until the surface is clean.
Step 5: Dispose of Wipes Properly
-
Discard used wipes responsibly. Do not flush. Ensure all adhesive residues are removed before allowing the floor to fully cure.
Helpful Tips
-
Timing Matters
- Bostik Wipe works best on fresh adhesive residues.
-
Surface Sensitivity
- Always test on a small inconspicuous area first, especially on delicate surfaces.
-
Keep Handy
- Have Bostik Wipe readily available on-site to manage spills as they occur, avoiding extra clean-up labor later.
Clean-up is just as important as application when it comes to professional flooring installation.
With Bostik Handy Wipe, you can maintain a pristine, high-quality finish by quickly and safely removing adhesive residues during and after application.
Incorporating Bostik Handy Wipe into your installation process not only protects your project investment but also reinforces your reputation for professional workmanship.
Buy BOSTIK at Home Hardware
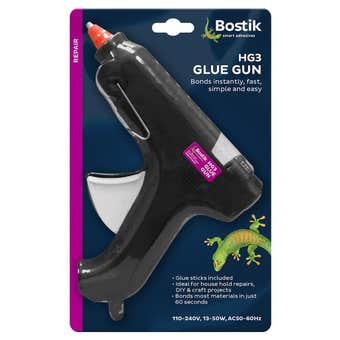
Bostik is a renowned global brand offering cutting-edge adhesive solutions for diverse industries. With a strong presence in Australia, Bostik caters to the construction sector with its comprehensive range of sealants, grabs, adhesives, waterproofing systems, and wall solutions. Additionally, Bostik's industrial adhesives find applications in automotive, transportation, packaging, and consumer goods manufacturing, ensuring reliability and efficiency.
Bostik's DIY solutions empower Australian homeowners and enthusiasts to tackle various projects with confidence and creativity. These innovative products can be conveniently purchased online and at Home Hardwarestores across Australia, making them accessible to a wide audience. Whether for home improvement or professional use, Bostik's products are designed to deliver exceptional results, supporting a variety of needs and applications.


