


- 12 October 2020
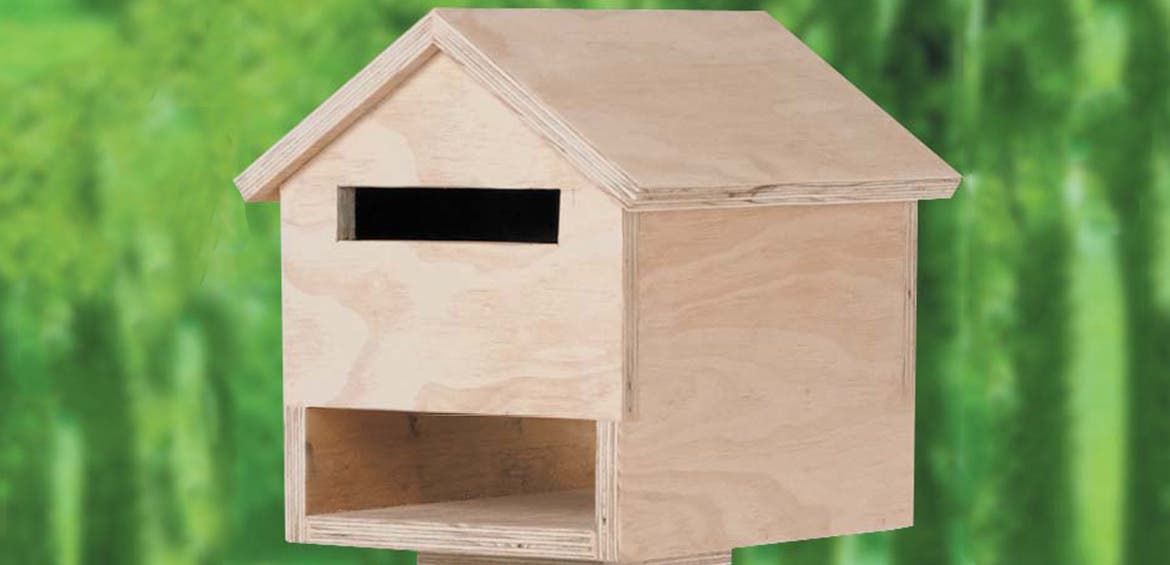
Build your own timber letterbox
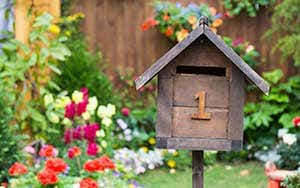
Make sure your mail is delivered clean and dry.
The letterbox is often one of the postman’s biggest headaches! Either it’s not there, it’s falling to bits or it’s barely large enough to take standard mail. Building a new letterbox is easy and when finished, you’ll have an asset to your home that is aesthetically pleasing and practical.
STEP 1
Tools Required
This is not a complicated project, but you will need these tools to make the best job: fine handsaw, electric drill, jigsaw and circular saw, wood drill bits (augers), claw hammer, nail punch, spirit level, G clamp, pencil, carpenter’s square, measuring tape, marking gauge, waterproof glue and spade.
STEP 2
Materials
You can make this HOME letterbox from one (1) length of dressed Radiata Pine 2100x290x19mm, selecting a length with the least amount of knots. As an alternative you may prefer to use exterior grade plywood - sheet size: 1200x900x19mm. Plywood has a better strength/weight ratio than solid pine timber and retains its shape in all climates, however, like pine, it must be stained or painted to suit the surrounding environment. For the support post, use Treated Pine (marked H4) or Red Gum 90x90x1500mm.
TIMBER COMPONENT LIST
- Roof - 2pcs - 410x175mm
- Sides - 2pcs - 330x175mm
- Floor - 1pce - 330x230mm
- Front & Rear Ends - 2pcs - 230x185mm
- Shelf - 1pce - 290x190mm
- Door - 1pce - 145x120mm
- Supports - 2pcs - 150x90mm
- Side Blocks - 2pcs - 90x30mm
- Post - 1pce - 90x90x1500mm
- Treated Pine or Red Gum sole plate for bottom of post.
ADDITIONAL MATERIALS
STEP 3
Measuring and Cutting
The ends - cut one (1) piece of board 230x185mm. Make sure you measure and square it very accurately. Then clamp this piece on top of the main board and saw another piece the same size (Diagrams 1&2) using a piece of scrap wood under the jaw of the clamp to prevent marks on the piece you have just cut.
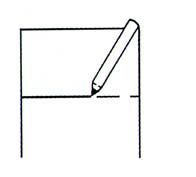
Diagram 1 - Pencil the line
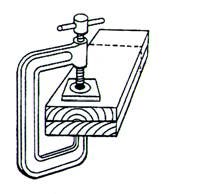
Diagram 2 - Clamp the pieces
Now measure the roof angle by marking a centre line down each end piece you have just cut out, then measure 118mm up from the bottom. Square a line across the width. A line should then be drawn from the 118mm mark one each edge up to the top of the centre line - now cut the roof angle (Diagram 3).The door opening and mail slot - the door opening is cut out of the rear end - 150x118mm. Measure up 118mm from the bottom edge at each side and square a line across; now measure in 40mm from each side and rule lines down to give the required door opening size. Drill two (2) holes (10mm drill bit) in the top two (2) corners, then cut along the top line and down the side lines with a jigsaw (Diagram 4).
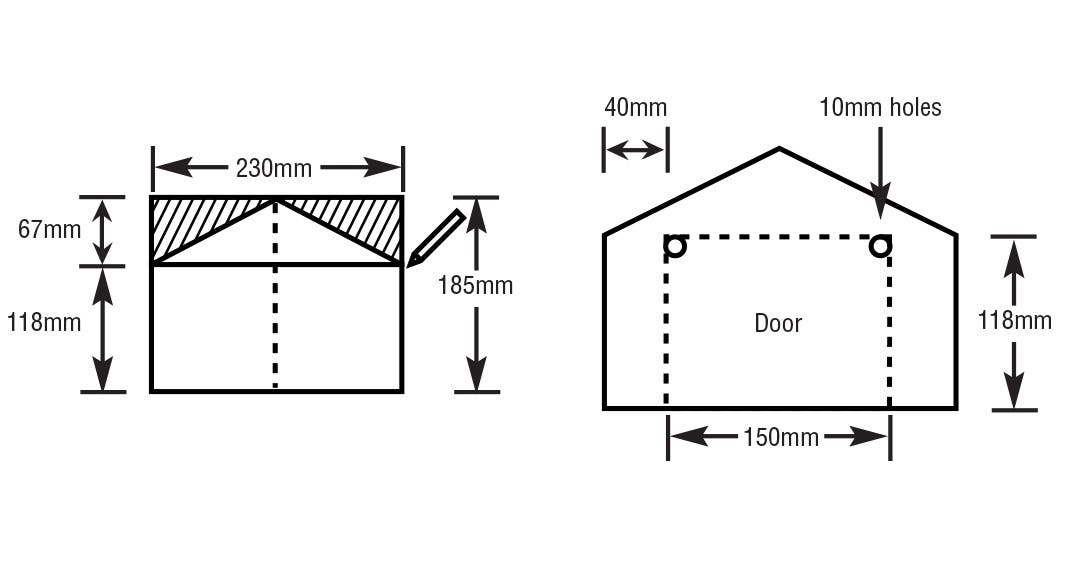
Diagram 3 & 4 - Measuring the roof angle & door opening
For the Mail Slot in the front piece, measure up 118mm from the bottom at each side and square off; then, again from the bottom, measure up 98mm and square off. Use a 25mm spade bit and drill a hole 25mm in from each end and cut along the lines to form the slot, clean off the edges with sandpaper (Diagram 8).
The sides, bottom, door and roof - To make two (2) identical 330x175mm sides, cut as previously outlined above for the ends. Now measure carefully and cut out the marked section on both sides to 118x19mm (Diagram 5).
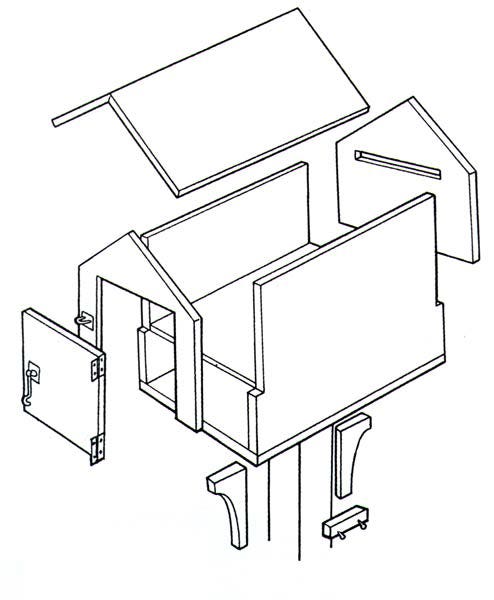
Diagram 5
Other components to be cut now are: the floor 300x230mm, inside shelf 290x190mm, two (2) curved front and back brackets, each 150x90mm (Diagram 6&7) and two (2) post supports 90x30mm.
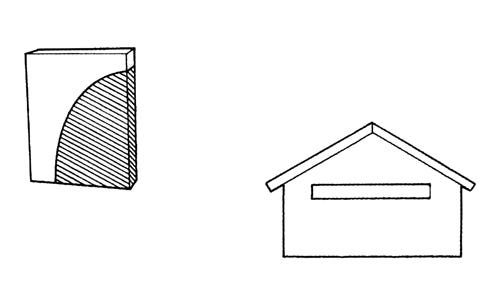
Diagram 6
The roof is made by cutting two (2) pieces 410x175mm. A 30 degree angle will need to be cut using a block plane to ensure that the roof joins neatly and evenly at the peak (Diagram 8). Depending on how accurate you were at cutting, you may have to make some adjustments to the join angle at the peak.
STEP 4
Assembling the pieces
Start by assembling the two (2) ends to the two(2) sides, spreading the waterproof glue evenly along the rebates and nail the sides. Repeat the same action for the bottom piece, making sure all edges are flush. You can now fit the inside shelf to the sides, using glue and nails, once the shelf is flush with all edges.
Now put the roof pieces in place, a section at a time; align the pieces with the apex - allow an overhang of at least 20mm at each side and about 30mm front and back. Glue and nail in place. The second roof section is then positioned, checking for fit before gluing and nailing. Punch all nails just below the timber surface.
Cut out a small recess in the door and opening to allow the hinges to fit neatly. Next screw the hinges in place and make sure the door opens and closes freely, then align and fix the hasp and staple catch for each closing.
Lastly, on the bottom of the floor, mark the centre of the letterbox and from this point measure and draw in the overall post size. Now position the fixing b locks, 90x30mm, flush with the side lines and fasten to the bottom with glue and 2x50mm screws for each piece. Now add the curved supports with glue and screws to the back and front to add stability and appearance. Place the letterbox on the top of the post and drill a 4mm hole through both fixing blocks and curved supports and secure with 50mm screws.
STEP 5
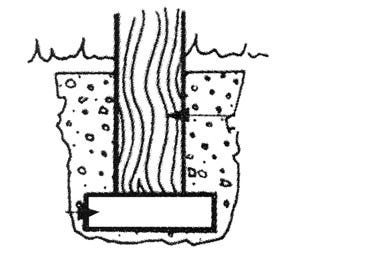
The Concrete Base
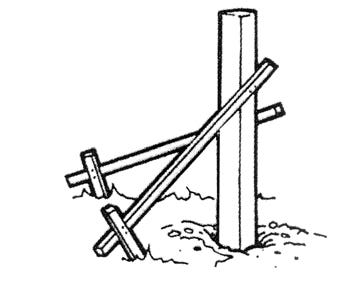
Dig a hole 400mm deep and place a sole plate in the bottom of the hole. Place the post with the letterbox on the top into the hole standing on the sole plate (Diagram 9). Use diagonal bracing to make sure that the post stays plumb (Diagram 10) - use a spirit level. Pour wet readymix concrete into the hole around the post and compact well. Leave 3-4 days for the concrete to set properly and remove the bracing.
STEP 6
Protecting Your New HOME Letterbox
To finish your project, punch all the nail heads just below the timber surface and fill the holes with wood filler. Then fully sand the whole letterbox and sandpaper, rounding off any sharp edges. To finish, coat the timber with a good quality oil based exterior paint or pigmented stain to protect the timber and add to the final appearance of your new HOME letterbox.
TIPS FROM THE TRADE
- Ensure you measure the timber accurately twice before you cut it once.
- Drill small pilot holes for nails that are near edges to avoid splitting the timber and always punch the head below the surface, fill with wood filler and sand smooth.
- Remember to stain or paint one coat on all the timber pieces before assembling your project. This will help to seal the joints and add to the life of your letterbox.
- Always use galvanised nails and/or screws to avoid unsightly rust stains.


